
PSMN & CBP
Connection to the PSMN
PSMN access is through ssh. To connect to a server you need to type a command like ssh psmn_login@server_name
You need to go through different servers to access the PSMN resources:
- Access to the PSMN network via
ssh.ens-lyon.fr(go here to activate your access, with your webmail account) orssh.psmn.ens-lyon.fr(with yourt psmn account) - Connect to allo-psmn.psmn.ens-lyon.fr
- Connect to a compilation server like
cl5218comp2(full list here), you want to choose one from the lake scratch
The allo-psmn.psmn.ens-lyon.fr server allows you to access your home directory ~/ and the /Xnfs/lbmcdb/ space.
The compilation server gives you access to the qsub command and the /scratch/Bio space
Connect to ssh.ens-lyon.fr
To connect to ssh.ens-lyon.fr you can use ssh keys:
ssh-keygen -t ed25519 -C "your.mail@ens-lyon.fr"
rename the key to id_ed_ens and type a password (the characters won't show as you type).
Then you are going to edit the file ~/. ssh/config to add the following content (you can use nano ):
Host ens
Hostname ssh.ens-lyon.fr
User your_login
IdentitiesOnly yes
IdentityFile ~/.ssh/id_ed_ens
PreferredAuthentications publickey,password
Save your modification.
You need to copy your ssh public key to ssh.ens-lyon.fr with the following command:
ssh-copy-id -i ~/.ssh/id_ed_ens.pub ens
Test your connection with:
ssh -T ens
Connect to allo-psmn.psmn.ens-lyon.fr
To connect to allo-psmn.psmn.ens-lyon.fr you can use ssh keys:
ssh-keygen -t ed25519 -C "your.mail@ens-lyon.fr"
rename the key to id_ed_allopsmn and type a password (the characters won't show as you type).
Then you are going to edit the file ~/. ssh/config to add the following content (you can use nano ):
Host allo-psmn
  ProxyJump ens

  Hostname  allo-psmn.ens-lyon.fr

  User  your_login

  IdentitiesOnly  yes

  IdentityFile  ~/.ssh/id_ed_allopsmn

  PreferredAuthentications publickey,password
Save your modification.
You need to copy your ssh public key to allo-psmn.ens-lyon.fr with the following command:
ssh-copy-id -i ~/.ssh/id_ed_allopsmn.pub allo-psmn
Test your connection with:
ssh -T allo-psmn
Connect to a compilation server like cl5218comp2
To connect to allo-psmn.psmn.ens-lyon.fr you can use ssh keys:
ssh-keygen -t ed25519 -C "your.mail@ens-lyon.fr"
rename the key to id_ed_psmn and type a password (the characters won't show as you type).
Then you are going to edit the file ~/. ssh/config to add the following content (you can use nano ):
Host psmn
  ProxyJump allo-psmn

  Hostname cl6242comp1

  Hostname  allo-psmn.ens-lyon.fr

  User  your_login

  IdentitiesOnly  yes

  IdentityFile  ~/.ssh/id_ed_psmn

  PreferredAuthentications publickey,password
Save your modification.
You need to copy your ssh public key to allo-psmn.ens-lyon.fr with the following command:
ssh-copy-id -i ~/.ssh/id_ed_psmn.pub psmn
and test your connection with:
ssh -T psmn
The Different storage on the PSMN
There are 3 main storage spaces for you on the PSMN, your home, the Xnfs and the scratch
Your home /home/psmn_login/
You home is where you can store all your configuration files and small scripts. Your home is the same on every server in the PSMN network (including the computing nodes)
The /Xnfs/lbmcdb/
The /Xnfs/lbmcdb/ space is where you should put a copy of everything you do on the PSMN (data, codes, etc.). There is one folder per LBMC team in this folder so you should put your data in a path like /Xnfs/lbmcdb/your_team/your_project/.
You can put or look for common reference genome and annotation in the folder /Xnfs/lbmcdb/common/
The Xnfs space while resilient, doesn’t have a back-up. So be sure to follow the guide of good practice to manage your precious code and data
The /scratch/Bio/
The /scratch/Bio/psmn_login/ is where you want to do you computation on the PSMN. This storage is very fast (expensive), which means that once your computation done, you should move things from /scratch/Bio/psmn_login/your_project/ to /Xnfs/lbmcdb/your_team/your_project/.
You have to create your own /scratch/Bio/psmn_login/ folder when you start to use the PSMN.
You can find the singularity image used by the LBMC pipeline in the shared folder /scratch/Bio/singularity/.
The /scratch/Bio/ is only accessible from the lake cluster (see list of queues).
Retrieve or deposit files on the PSMN:
For the following steps to work you need to be connected on the ENS network or the ENS VPN . You also need an active PSMN account ( you can ask here if you forgot your password ).
From the Terminal
To retrieve or deposit files on the PSMN storage you can use classical scp command on the allo-psmn.ens-lyon.fr ssh server with your PSMN login. Not that you cannot access the /scratch/ mount point from allo-psmn.ens-lyon.fr .
scp my_project/data/*. fastq.gz my_login@allo-psmn.ens-lyon.fr:/Xnfs/lbmdb/my_team/my_project/data/
But to avoid any file corruption problem during the transfers, it's safer to use rsync in place of scp with the -auvc options
rsync -auvc my_project/data/*. fastq.gz my_login@allo-psmn.ens-lyon.fr:/Xnfs/lbmdb/my_team/my_project/data/
From Filezilla
You can also use the free graphical tool FileZilla to do the same with the following steps:

- launch FileZilla
- go to Files > Site Manager
- Click on the New site button
- In the General tab select SFTP - SSH File Transfer Protocol in the Protocol field
- Set allo-psmn.ens-lyon.fr in the Host field
- Choose Ask for passwords In the Logon Type field
- Add your PSMN login in the User field
- Click on the Connect button
- Accept the allo-psmn.ens-lyon.fr certificate
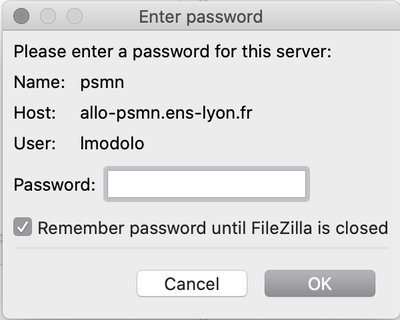
- Enter your PSMN password
You can go to your your team Xnfs folder by setting the Remote site path field to /Xnfs/lbmcdb/Your_team_folder/.

You can transfer files from your local computer to the PSMN by dragging them between the left folder tree (your computer) and the right folder tree (the PSMN).
Launching a Nextflow pipeline at the PSMN
First, you need to copy your data in your team /Xnfs/lbmcdb/ folder:
rsync -auv -P --human-readable your_project psmn:/Xnfs/lbmcdb/your_team/your_project
Preparing Your Environment
Then you need to log to the psmn to prepare your environment
ssh psmn
Ssh Configuration
We need to create ssh key to log to the gitbio server:
ssh-keygen -t ed25519 -C "your.mail@ens-lyon.fr"
rename the key to id_ed_gitbio and type a password (the characters won't show as you type).
You can display the content of your public key with the command:
cat /home/${USER}/. ssh/id_ed_gitbio.pub
Copy the line containing your key and save it on the gitbio ssh keys management page , you can name the key PSMN .
Then you are going to edit the file ~/. ssh/config to add the following content (you can use nano ):
Host gitbio.ens-lyon.fr
Preferredauthentications publickey
IdentityFile ~/. ssh/id_ed_gitbio
Save your modification and test your connection with the command:
ssh -T git@gitbio.ens-lyon.fr
You should see a welcome message.
Pipeline Configuration
You need to create a working directory on the scratch
mkdir /scratch/Bio/${USER}
cd /scratch/Bio/${USER}
Then clone your pipeline
git clone git@gitbio.ens-lyon.fr/LBMC/my_pipeline
cd my_pipeline
src/install_nextflow.sh
Then get a copy of your data on the scratch
rsync -auv /Xnfs/lbmcdb/your_team/your_project/data/ data/
Pipeline Execution
For now you have to launch your pipeline within a tmux session. To do so enter the following command:
tmux
./nextflow src/my_pipeline -profile psmn --param1 val1 ... --paramn valn
You can detach your tmux session by pressing ctrl + b and then d
To attach your tmux session type:
tmux a
nextflow will continue to run in a detached tmux session, which means that you can log-out of the psmn without terminating your pipeline.
You can terminate nextflow withing your tmux session by pressing ctrl + c or terminate your tmux session by pressing ctrl + b and then x