Ceci est une ancienne révision du document !
Visualization server
The r740visu server is dedicated to extensive visualization (OpenGL/Mesa/CUDA8) at PSMN.
It is equipped with 2 Intel processors Xeon Gold 5122 @3.6GHz (16 logical cores) with 192 GiB of RAM. It is accessible using x2go and has a hardware accelerator NVidia Quadro P4000©.
Finally, and most importantly, the server give access to the /scratch/E5N (scratch system common to E5-* queues.
r740visu is not a submission node.
This machine was set up thanks to the preparatory work, recipes and integrations carried out on the CBP experimental platform.
1. Prerequisites
- Install x2go (x2goclient) on user's workstation (Linux, Mac or Windows ⇒ http://wiki.x2go.org/)
2. Configure the x2goclient
- New session
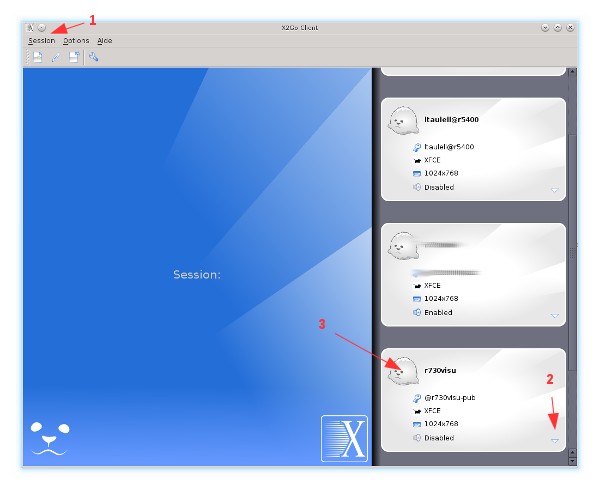
- Session → New,
- You can return to the parameters by clicking on the small arrowhead,
- The session is saved in this white rectangle.
- Parameters: Tab Session
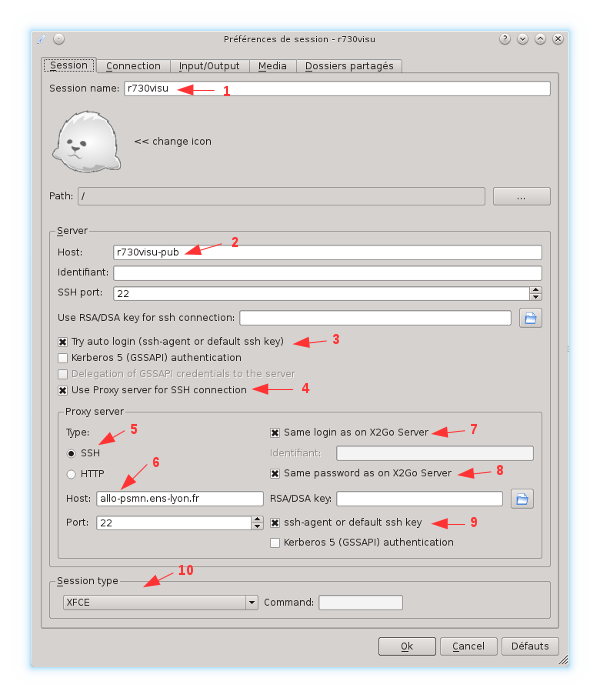
- Name the session,
- Host = r740visu,
- Try auto login → Checked,
- Use proxy server → Checked,
- SSH → Checked,
- Host = allo-psmn.psmn.ens-lyon.fr,
- Same login → Checked,
- Same password → Checked,
- ssh-agent → Checked,
- Session type =
 XFCE .
WARNING : the Session type NEED to be SET TO XFCE
- Parameters: Tab Connection
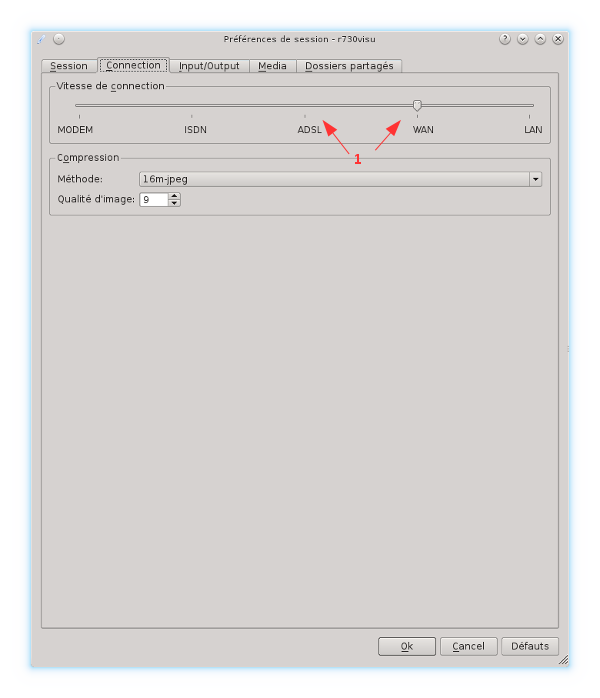
- choose a speed between ADSL and WAN.
- Parameters: Tab Input/Output
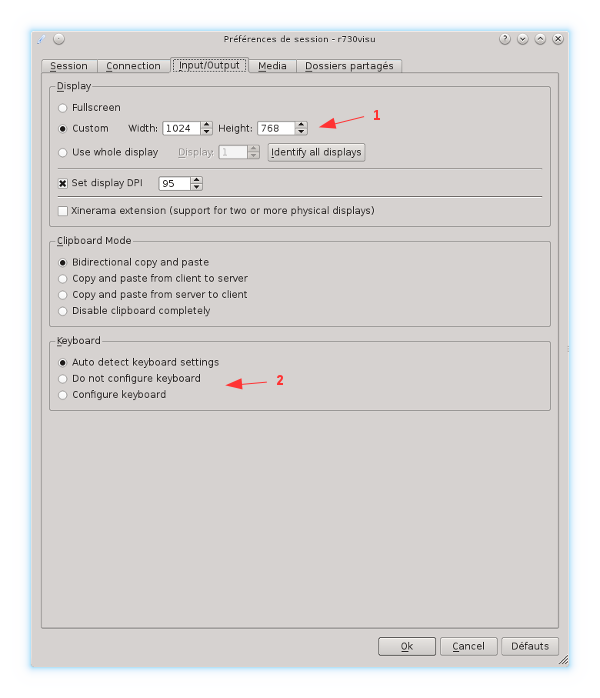
- Customize the screen size, or leave in Full/whole mode, your choice,
- If necessary, force keyboard settings (Mac and Windows).
- Parameters : Tab Media
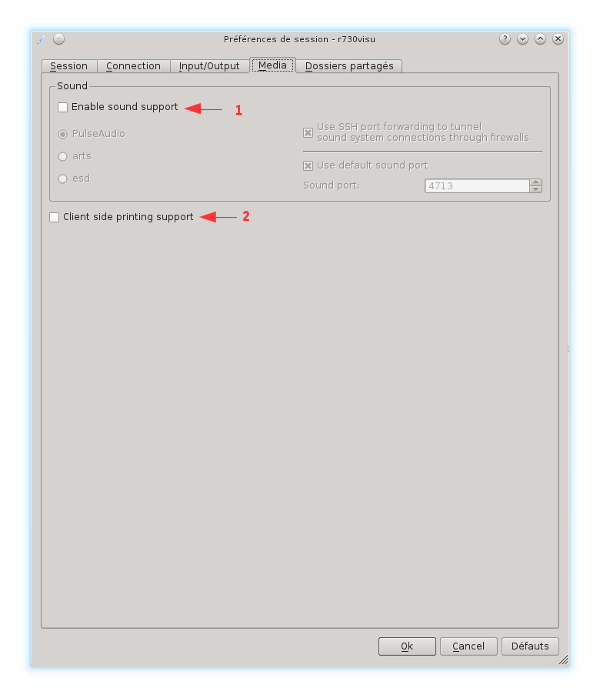
- Sound support → Unchecked,
- printing support → Unchecked.
- Parameters: Tab Directory
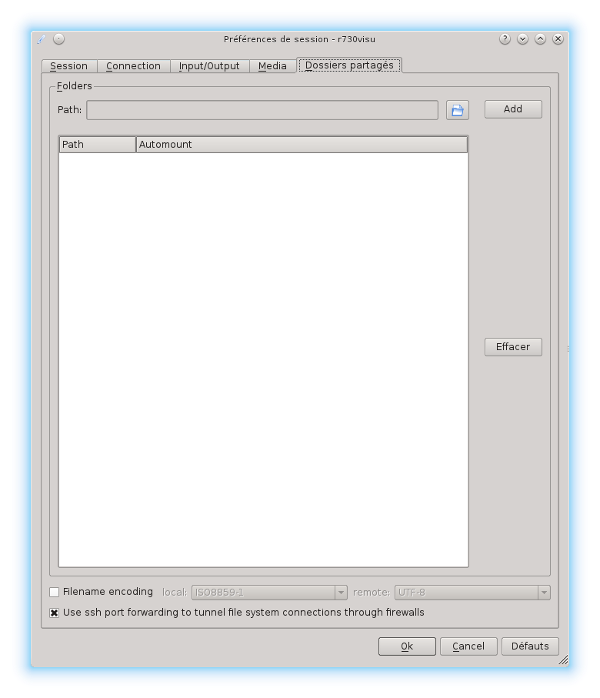
(nothing to do)
3. Connection
Just click on the session of your choice (arrow 3) to start the connection process.
Expected result:

3,5. Connection from outside (Linux, Mac)
This paragraph concerns a connection to the visualization machine from outside the School, from a Linux or Mac OSX client. SSH bounces must be active, make sure you have read (understood and tested) the related documentation.
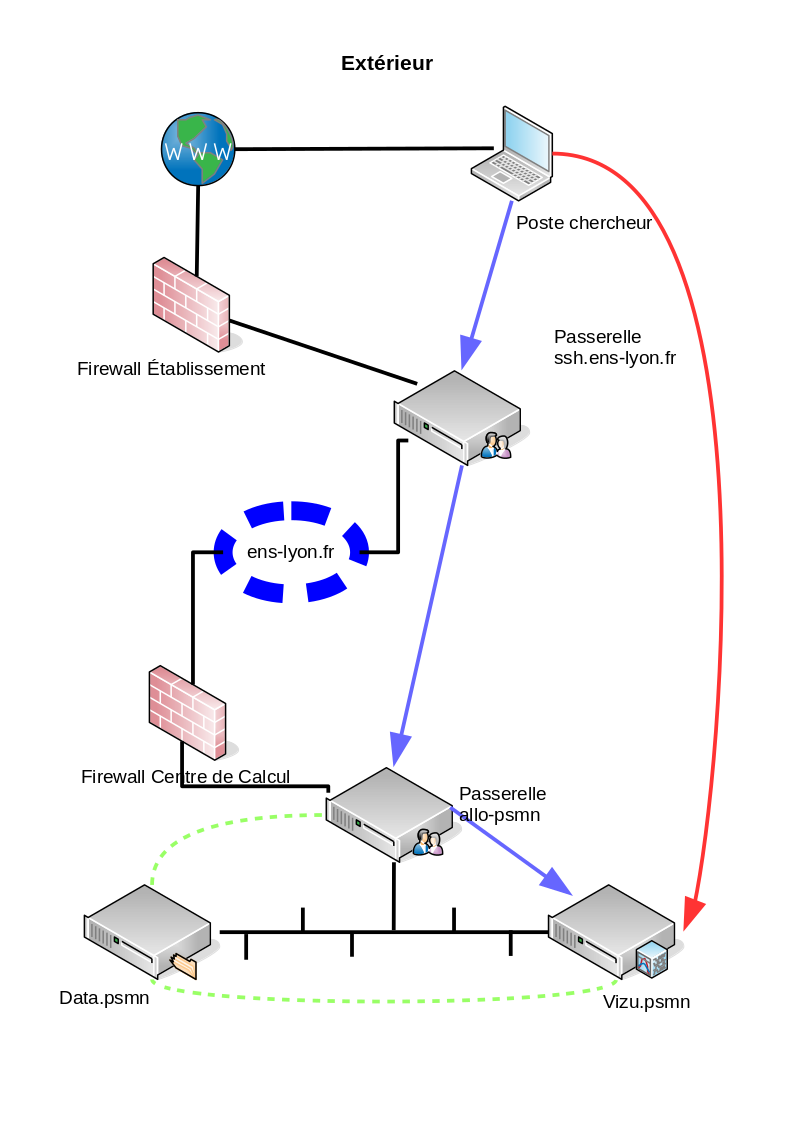
Keys :
- black : physical connection
- blue : standard ssh connection
- red : virtual ssh connection (bounce)
- green : NFS link (/home)
- Minimal modification to be made in your
~/.ssh/config(on user station):
Host allo-psmn-multihop
  User $USER
  ProxyCommand ssh -qt $USER@ssh.psmn.ens-lyon.fr tcpconnect allo-psmn.psmn.ens-lyon.fr %p
Replace $USER by your PSMN login.
- Modification x2go :
In the tab Session, block Proxy server, box Host, replace allo-psmn.psmn.ens-lyon.fr by the new configuration : allo-psmn-multihop. You must get the same thing as in §3 at the login x2go.
4. Connection Windows/PuTTY, External access
This part is about connection to visualization server from a network outside of ENS de Lyon (see illustration).
Légende :
- black : physical link
- blue : ssh standard connection
- red : ssh virtual connection (hops)
- green : NFS mount (/home)
Creating an SSH tunnel
The following steps assume that you have already configured your SSH rebounds to allo-psmn (see this documentation)
The first step is to create an SSH tunnel to the visualization machine. :
- Copy the gateway session (allo-psmn, Load, rename, save).
Change the “Host Name” to that of the display machine (here, for the example, r740visu). So rename the session to r740visu (to follow the example) and save.
Be sure to enter the full name in
Host Name (here r740visu.psmn.ens-lyon.fr)
 .
.
- In
Connection→Proxy, selectLocal. - In
Connection→Proxy, set “Telnet command” as follows :plink.exe -load allo-psmn -nc %host:%port

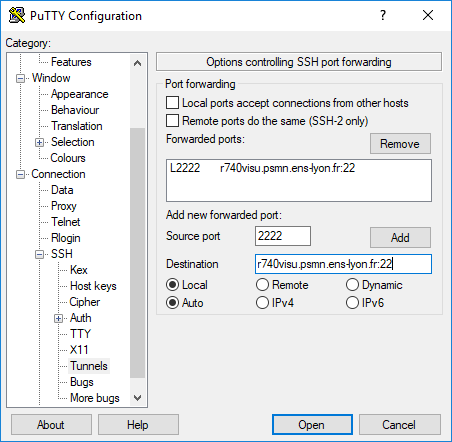
- In
Connection→SSH→Tunnels, setSource porton port 2222 andDestinationsurr740visu.psmn.ens-lyon.fr:22
- Return to
Session, save, then clickOpen. Your tunnel is now open.
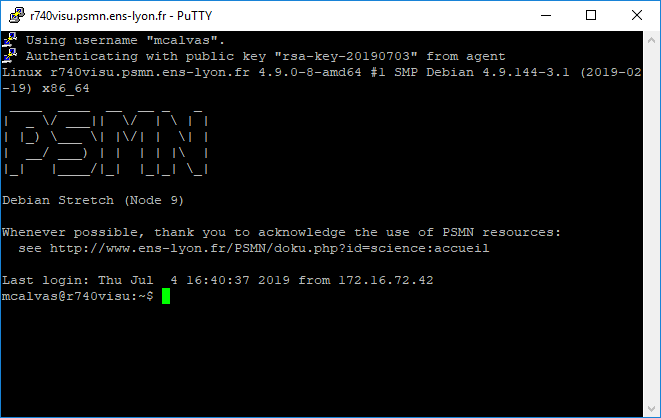
X2Go connection
The SSH session from Putty to r740visu must remain open, do not close the login window.
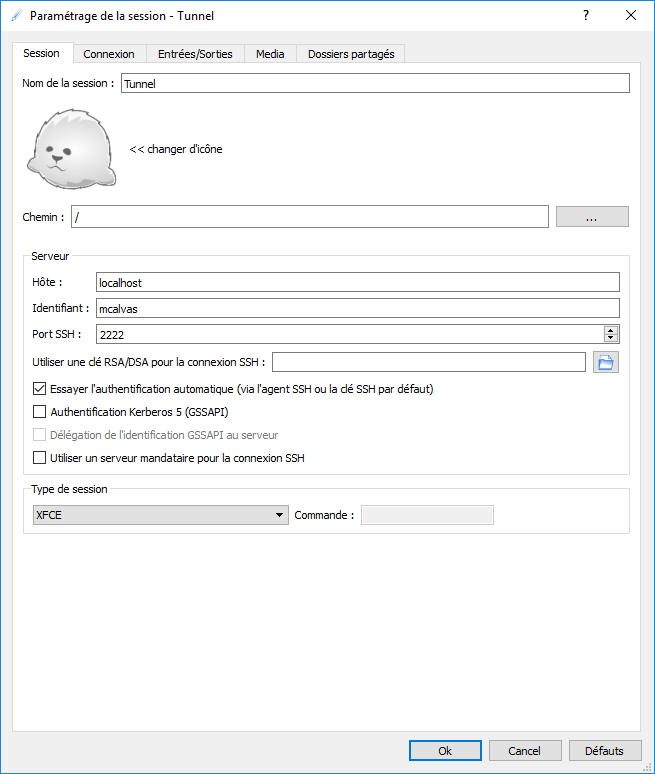
The X2Go session settings are as follows:
- In
Hostenterlocalhost. - In
Usernameenter your login. - Set
SSH Portto 2222. - Check the box
Try automatic authentication. - Set
Session TypetoXFCE.
Confirm with OK, then double-click the session icon on the right side of the X2Go client. You are now connected to the graphical interface of the machine.
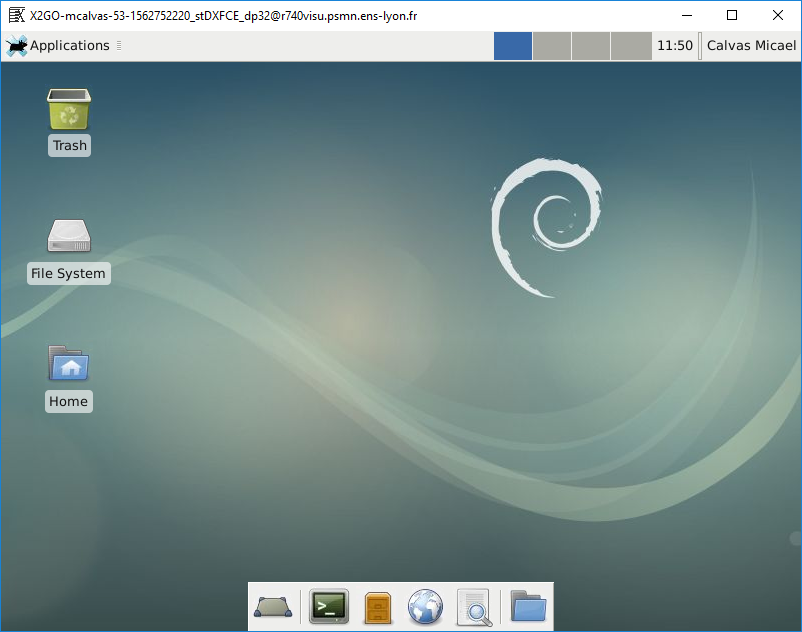
Usage
Every application installed in the PSMN environment can be used as is.
Numeric keyboard
If your numeric keypad is not recognized, in a terminal, run the program numlockx.
modulefiles
For every application requiring the loading of a modulefile, it is necessary to first load from a terminal the modulefile then run the application.
Sometimes, x2go sessions don't load the ~/.profile. You can force it, by hand, with source ~/.profile, or add this line to your ~/.bashrc :
source /usr/share/lmod/lmod/init/bash
Mac users
MacOS X users must have X11 Mac server installed and running prior to use x2go-client, see x2goclient documentation
VirtualGL
For every application requiring hardware acceleration (OpenGL / GLX / GLSL / …), after loading the corresponding modulefile, you must prefix the call to the application by calling the VirtualGL wrapper: vglrun MyApp
Examples
- VMD
In a terminal run:
source ~/.profile
module load VMD/1.9.2
vglrun vmd

- molden/gmolden
In a terminal run:
source ~/.profile
module load Molden/5.4
vglrun gmolden

- ParaView
In a terminal run:
source ~/.profile
module load ParaView/4.4.0
vglrun paraview


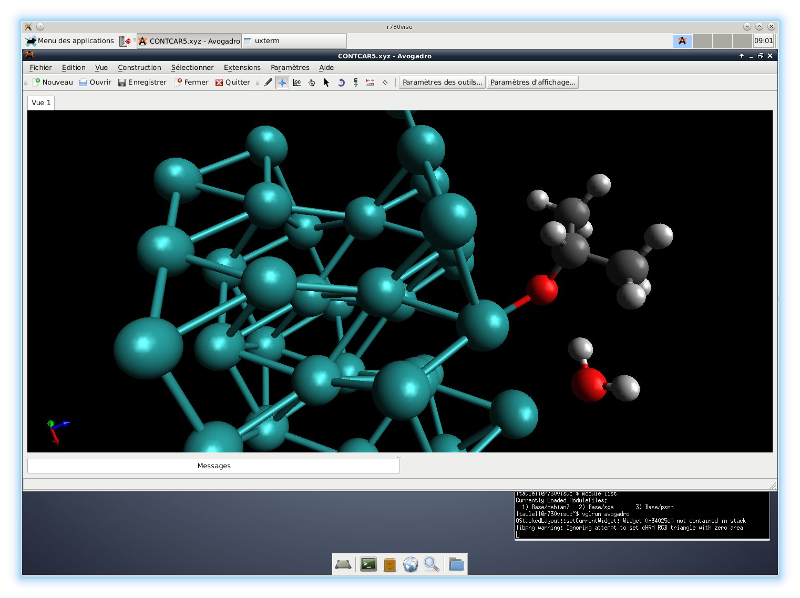
- Avogadro
In a terminal run:
source ~/.profile
vglrun avogadro